There’s a good chance you already own a hammer.
In fact, if someone opened the average household toolbox, the hammer would probably be one of the first tools they’d find.
And yet, it’s surprising how little most people know about it.
Disclaimer:
Our recommendations are based on extensive experience with and/or knowledge of these products, and we do so not because of the modest commissions we could earn but rather because we believe they are actually beneficial and useful. We are honored to be these tools' affiliates. We might receive commissions from Amazon, and other merchants when you buy something after clicking one of our links. Our affiliate policy is covered in more detail here. If you don't think these things will help you accomplish your goals, please don't spend any money on them.
Many homeowners spend time researching drills, power saws, and fancy gadgets while giving almost no thought to the humble hammer sitting quietly in the corner of the toolbox.
That usually changes the first time a project doesn’t go as planned.
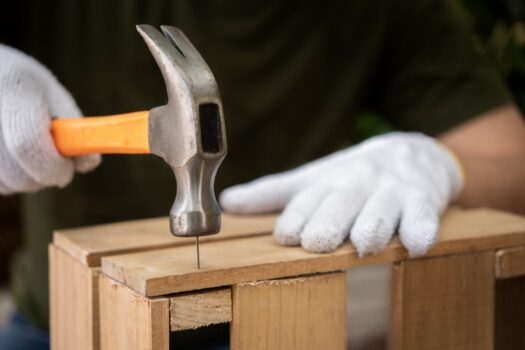
Maybe you’ve tried driving a nail into a piece of wood only to bend it repeatedly.
Maybe you’ve struggled to remove an old nail from a fence.
Or perhaps you’ve discovered that the hammer you own isn’t actually the best hammer for the job you’re trying to do.
That’s when things get interesting.
Because not all hammers are created equal.
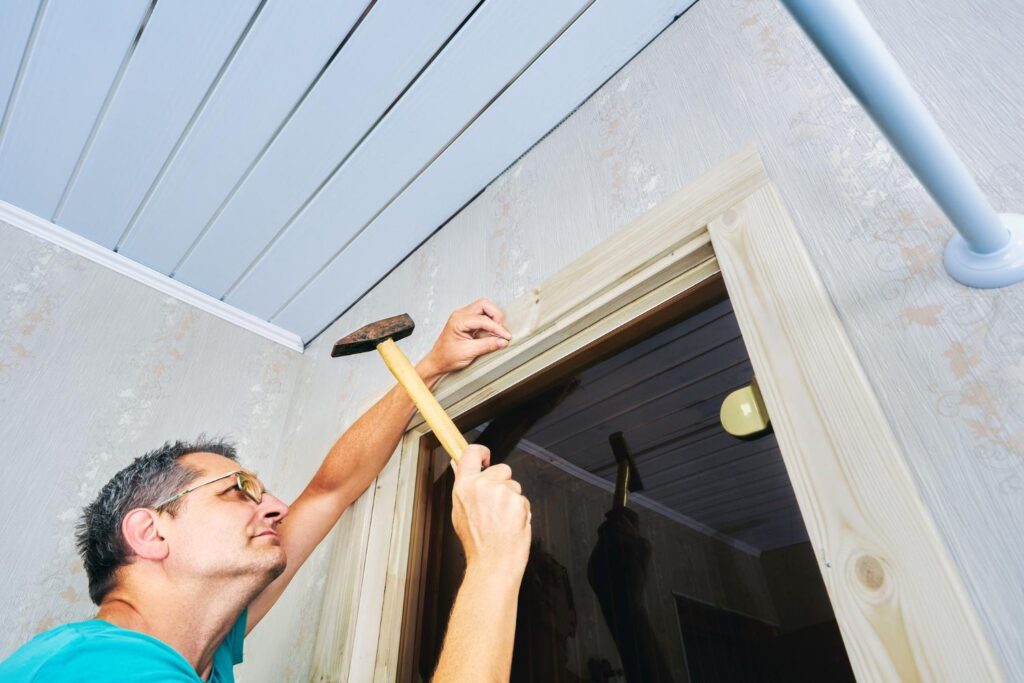
The hammer used to frame a house isn’t the same hammer used to install trim. The tool a mechanic reaches for looks very different from the one a homeowner might use to hang a picture frame. Even something as simple as handle material can dramatically change how a hammer feels after an hour of work.
The truth is that a good hammer can make a project feel easier, faster, and more enjoyable.
A bad hammer can make a simple task surprisingly frustrating.
The good news is that choosing the right hammer isn’t complicated once you understand a few basics.
In this guide, we’ll explore the different types of hammers, how to choose the right one for your projects, common mistakes to avoid, and the practical lessons that can save you time, money, and possibly a bruised thumb.
Let’s start with a simple question:
Why does a tool that’s been around for thousands of years still deserve a permanent place in every modern DIY toolkit?
Why Every DIYer Needs a Hammer
A funny thing happens once you start taking on DIY projects.
You begin noticing how often a hammer shows up.
Not necessarily because it’s the perfect tool for every task, but because it solves dozens of small problems that appear unexpectedly.
One moment you’re hanging a picture.
The next you’re tapping a stubborn piece of trim into place.
A few days later you’re pulling an old nail from a fence, adjusting a wooden panel, or assembling a workbench.
The hammer has a habit of quietly making itself useful.
That’s probably why it has survived for thousands of years while countless other tools have come and gone.
Simple, Reliable, Always Ready
One of the biggest advantages of a hammer is its simplicity.
No batteries.
No chargers.
No extension cords.
No settings.
When a task requires a hammer, you simply pick it up and get to work.
There’s something refreshing about that in a world filled with increasingly complicated tools and gadgets.
A hammer works today exactly the same way it worked yesterday.
And chances are, it will still work years from now.
Some Jobs Are Just Better With a Hammer
Modern power tools are incredible.
They save time, reduce effort, and can dramatically increase productivity.
But there are plenty of situations where a hammer remains the better option.
For example:
- Hanging pictures
- Installing small nails
- Removing old fasteners
- Light demolition work
- Adjusting wooden components
- Tapping materials into alignment
Pulling out a cordless drill for some of these tasks would be like using a chainsaw to cut a birthday cake.
Possible?
Technically.
Necessary?
Not really.
The Tool That Teaches Confidence
Many people’s first successful DIY project involved a hammer.
Maybe it was building a birdhouse with a parent.
Maybe it was assembling furniture in a first apartment.
Maybe it was a simple repair around the house.
Whatever the project, the hammer often serves as an introduction to working with tools.
It’s straightforward.
You can see the results immediately.
And unlike some more complex tools, it doesn’t require hours of study before getting started.
In many ways, a hammer helps build something more important than projects.
It helps build confidence.
Not Every Hammer Is the Same
This is where many beginners get caught off guard.
They assume a hammer is simply a hammer.
Then they visit a hardware store.
Suddenly they’re staring at:
- Claw hammers
- Framing hammers
- Ball peen hammers
- Rubber mallets
- Dead blow hammers
- Sledgehammers
It’s a bit like discovering that “car” isn’t a single category.
A sports car, pickup truck, and tractor all move people around, but they’re designed for very different jobs.
The same idea applies to hammers.
Choosing the right one can make work easier, improve accuracy, and reduce fatigue.
Choosing the wrong one can leave you wondering why a simple task feels so difficult.
The Hammer Most Homeowners Actually Need
Here’s some reassuring news.
Most homeowners don’t need six different hammers.
In fact, if your toolbox contained only one hammer, a quality claw hammer would handle the vast majority of projects you’ll encounter.
That’s why it’s often considered the starting point for every DIY toolkit.
The challenge isn’t owning every hammer.
It’s understanding which hammer belongs in which situation.
Once you understand the different types available, choosing the right one becomes much easier—and your projects become more enjoyable as a result.
Let’s take a closer look at the most common types of hammers and where each one shines.
Understanding Hammer Anatomy
At first glance, a hammer seems almost impossible to overcomplicate.
It’s a handle with a chunk of metal attached to the end.
What else is there to know?
Quite a bit, actually.
The difference between a hammer that feels comfortable and one that feels awkward often comes down to details most people never notice until they’ve spent an hour using it.
Understanding a few basic parts can help you choose a better hammer and use it more effectively.
The Head
The head is the business end of the hammer.
It’s responsible for delivering force to whatever you’re striking.
Different hammer types use different head designs depending on their purpose.
A framing hammer, for example, typically has a heavier head designed for driving large nails quickly. A finishing hammer is often lighter and offers more control for delicate work.
The weight of the head plays a major role in how the hammer feels during use.
Many beginners assume heavier automatically means better.
Usually it means more fatigue.
A hammer that’s too heavy can quickly turn a simple project into an arm workout you never asked for.
The Face
The face is the flat striking surface that contacts the nail or material.
Most homeowners will encounter two common styles:
Smooth Face
A smooth-face hammer leaves cleaner surfaces and is ideal for general household projects, trim work, and finishing tasks.
If you’ve ever accidentally hit a piece of finished wood, you’ll appreciate why smooth faces are popular.
Milled Face
Sometimes called a waffle face, this textured surface helps grip nail heads and reduce slipping.
Construction workers often prefer milled faces because they improve speed and control when driving large framing nails.
The downside?
That same texture can leave visible marks on finished materials.
Not ideal if you’re trying to impress anyone with your woodworking skills.
The Claw
The claw is the curved or straight section opposite the striking face.
Most people think of it simply as the nail-pulling part.
And yes, that’s one of its main jobs.
But it’s also useful for:
- Removing trim
- Separating boards
- Light prying tasks
- Demolition work
A curved claw is generally preferred for household use because it’s excellent at removing nails.
A straight claw provides more leverage and is commonly found on framing hammers.
The Handle
If the head provides power, the handle provides control.
The handle affects:
- Comfort
- Balance
- Shock absorption
- Accuracy
And surprisingly, handle material can make a huge difference during longer projects.
We’ll look at the most common options in a moment, but it’s worth knowing that two hammers with identical heads can feel completely different simply because of the handle.
The Grip
This is the part most people pay attention to in the hardware store.
For good reason.
A comfortable grip helps reduce fatigue and improves control.
When your hands become sweaty, dusty, or tired, a quality grip can make the difference between confident swings and awkward ones.
A hammer should feel secure in your hand without requiring a death grip.
If you’re squeezing the handle as though you’re hanging from a cliff, something probably isn’t right.
Why Balance Matters More Than Weight
Here’s something that surprises many beginners.
A well-balanced hammer often feels lighter than it actually is.
Meanwhile, a poorly balanced hammer can feel heavier than the scale suggests.
Think about carrying a grocery bag.
A perfectly balanced bag feels manageable.
A bag with all the weight hanging on one side feels awkward immediately.
Hammers work the same way.
Balance affects:
- Accuracy
- Comfort
- Swing efficiency
- Fatigue
This is one reason why experienced DIYers often spend a few minutes holding different hammers before making a purchase.
The best hammer isn’t necessarily the most expensive one.
It’s the one that feels right in your hand.
Now that you understand the basic anatomy, it’s time to answer the question most beginners ask when standing in the tool aisle:
Why are there so many different types of hammers in the first place?
Types of Hammers
If you’ve ever wandered through the tool aisle of a hardware store looking for a hammer, you’ve probably had the same reaction many people do:
“Why are there so many?”
After all, they all seem designed to hit things.
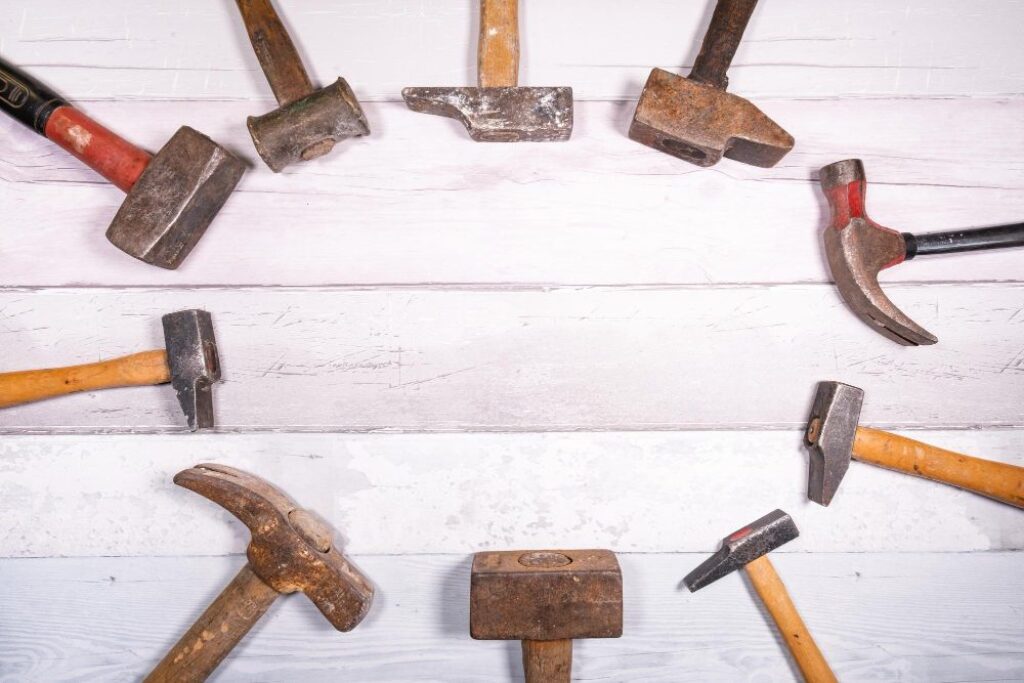
But once you understand what each hammer was built to do, the variety starts to make sense.
It’s similar to vehicles.
A sports car, pickup truck, and bulldozer all move from one place to another, but you wouldn’t use them interchangeably.
Hammers follow the same logic.
Each type is designed for specific tasks, materials, and working conditions.
Let’s look at the most common ones you’re likely to encounter.
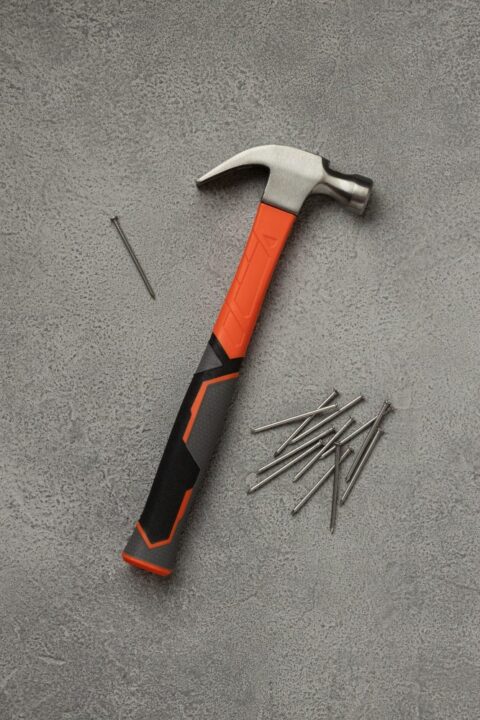
Claw Hammer
If hammers had a king, the claw hammer would wear the crown.
This is the hammer most homeowners should own first.
It’s versatile, affordable, easy to use, and capable of handling a huge range of projects.
The name comes from the curved claw on the back, which is designed for pulling nails.
Common uses include:
- Hanging pictures
- Furniture assembly
- Small woodworking projects
- Home repairs
- Installing trim
- General maintenance
For most DIYers, a 16-ounce claw hammer is the sweet spot.
Heavy enough to drive nails efficiently.
Light enough to avoid excessive fatigue.
If you’re only buying one hammer, this is usually the one.
Framing Hammer
Imagine the claw hammer’s bigger, stronger cousin.
That’s essentially a framing hammer.
Designed for construction work, framing hammers typically feature:
- Heavier heads
- Longer handles
- Straighter claws
- Greater striking power
They’re built for speed and efficiency when driving large framing nails.
A professional framer might swing a hammer thousands of times in a day, so every ounce of efficiency matters.
For the average homeowner, however, a framing hammer is often more tool than necessary.
It’s powerful, but it can also feel cumbersome during lighter projects.
Ball Peen Hammer
This is the hammer that often surprises people.
One side looks familiar.
The other side resembles a small metal ball.
Ball peen hammers are commonly used in:
- Metalworking
- Automotive repairs
- Machinery maintenance
- Shaping metal
The rounded end allows controlled shaping and forming without cutting into the material.
Unless you’re working with metal regularly, you may not need one immediately.
But it’s a useful tool to recognize because you’ll often see it in workshops and garages.
Rubber Mallet
A rubber mallet is proof that sometimes the goal isn’t to hit harder.
It’s to hit smarter.
The rubber head delivers force without damaging surfaces.
This makes it ideal for:
- Flooring installation
- Furniture assembly
- Tile work
- Positioning materials
- Light woodworking
Anyone who has ever dented a piece of wood with a standard hammer quickly learns to appreciate a rubber mallet.
It’s one of those tools you may not use every week, but when you need it, nothing else does the job quite as well.
Dead Blow Hammer
At first glance, a dead blow hammer looks unusual.
Inside the head are steel shot or similar materials designed to absorb rebound.
The result?
You strike an object and the hammer stays under control rather than bouncing back.
This makes dead blow hammers popular for:
- Automotive work
- Machinery maintenance
- Equipment assembly
- Precision adjustments
The first time you use one, it feels slightly strange.
The second time, you start wondering where it has been all your life.
Sledgehammer
The sledgehammer doesn’t believe in subtlety.
Its purpose is simple:
Move things.
Break things.
Demolish things.
With a heavy head and long handle, a sledgehammer generates tremendous force.
It’s commonly used for:
- Demolition
- Breaking concrete
- Driving stakes
- Heavy outdoor projects
Most homeowners won’t use one frequently, but when a project calls for serious force, few tools can compete.
It’s also the hammer most likely to make you feel like you’re starring in a home renovation television show.
Which Hammer Should You Buy First?
After seeing all these options, it’s easy to think you need several hammers immediately.
You don’t.
For most homeowners, a quality claw hammer will handle roughly 90% of common DIY tasks.
As your projects become more specialized, you can expand your collection accordingly.
A rubber mallet is often the second hammer many people add.
A framing hammer, dead blow hammer, or ball peen hammer usually comes later when specific projects justify the purchase.
The goal isn’t collecting hammers.
The goal is understanding which hammer solves which problem.
And once you understand that, choosing the right tool becomes surprisingly simple.
Of course, even the perfect hammer can feel awkward if it doesn’t fit your hand, your projects, or your working style. That’s why the next step is learning how to choose a hammer that feels right from the moment you pick it up.
Choosing the Right Hammer
Buying a hammer sounds simple.

Until you’re standing in the tool aisle holding three different models and wondering why they all feel slightly different.
The good news is that choosing the right hammer isn’t about finding the “best” hammer.
It’s about finding the best hammer for the work you’ll actually do.
Start With Your Projects, Not the Tool
This is one of the most useful buying principles in DIY.
Many people choose a tool first and then look for ways to use it.
A better approach is the opposite.
Think about the projects you’re most likely to tackle over the next year.
Will you be:
- Hanging pictures?
- Building shelves?
- Assembling furniture?
- Making household repairs?
- Working on woodworking projects?
For most homeowners, those tasks point directly toward a standard claw hammer.
Simple.
Reliable.
Versatile.
Problem solved.
Hammer Weight: Bigger Isn’t Always Better
If you’ve never bought a hammer before, it’s easy to assume heavier means better.
After all, more weight means more power.
Right?
Well… sort of.
A heavier hammer can certainly drive nails faster.
It can also wear you out faster.
Many beginners discover this the hard way after choosing a large framing hammer because it looked impressive.
Ten minutes later, they’re wondering why their shoulder feels sore.
For general DIY projects:
- 16-ounce hammers are usually ideal.
- 20-ounce hammers suit heavier work.
- Lightweight finishing hammers offer greater control.
Unless you’re regularly building decks or framing structures, a 16-ounce claw hammer is often the safest choice.
Think of it as the “daily driver” of the hammer world.
Handle Materials: More Important Than Most People Realize
This is where hammers start feeling very different.
Most handles fall into three categories.
Wood Handles
Traditional.
Classic.
Comfortable.
Many people simply enjoy the feel of a wooden handle.
Wood naturally absorbs vibration and has a timeless appeal that modern materials struggle to replicate.
The downside is that wood can eventually crack or break under heavy use.
Fiberglass Handles
For many homeowners, fiberglass offers the best balance of durability, comfort, and price.
Fiberglass handles:
- Reduce vibration
- Resist weather
- Require little maintenance
- Remain lightweight
It’s no surprise they’ve become extremely popular.
Steel Handles
Strong?
Absolutely.
Indestructible?
Almost.
Comfortable?
That depends.
Steel handles can transmit more shock into your hand and arm, although modern grip designs have improved this significantly.
Some people love them.
Others prefer fiberglass or wood.
This is one of those situations where personal preference matters.
The Grip Test
Here’s a simple trick.
Ignore the packaging for a moment.
Ignore the brand.
Ignore the marketing.
Pick up the hammer.
How does it feel?
Seriously.
That’s often the best test.
A hammer should feel balanced and natural in your hand.
It shouldn’t feel like you’re fighting it.
The moment a hammer feels awkward, nose-heavy, or uncomfortable, your body is already telling you something.
Listen to it.
Don’t Buy a Hammer for Your Future Self
This is another trap many people fall into.
They buy tools based on projects they might do someday.
The result?
A toolbox filled with tools that rarely get used.
Buy for the projects you’re doing now.
When your projects change, your toolbox can evolve with them.
That’s exactly how most experienced DIYers built their collections.
One project at a time.
One lesson at a time.
One tool at a time.
My Recommendation for Most Homeowners
If a friend asked me:
“I need one hammer. Which one should I buy?”
My answer would be simple.
A quality 16-ounce claw hammer with a fiberglass handle.
It’s versatile enough for everyday DIY work, comfortable to use, affordable, and capable of handling the vast majority of household projects.
Not the flashiest answer.
But often the right one.
Of course, even the best hammer won’t save you from a few classic beginner mistakes. And if you’ve spent any time around DIY projects, you’ve probably seen at least one of them happen already.
Hammer Safety Tips
Let’s be honest.
Most people don’t think of hammers as dangerous.
Compared to power saws, angle grinders, and nail guns, a hammer seems relatively harmless.
And most of the time, it is.
Until it isn’t.
The challenge with simple tools is that familiarity can create complacency.
People tend to be cautious around a circular saw.
They tend to be casual around a hammer.
That’s often when mistakes happen.
Fortunately, staying safe doesn’t require complicated procedures or special training.
A few simple habits go a long way.
Wear Safety Glasses
I know.
Nobody wakes up excited to wear safety glasses.
But if there is one safety habit worth developing, this is probably it.
Nails can bend.
Wood can splinter.
Small fragments can fly in unexpected directions.
And unfortunately, eyes don’t come with replacement parts.
A pair of safety glasses costs less than a pizza and may be the smartest purchase in your toolbox.
Make Sure Your Workpiece Is Secure
Trying to hold a board with one hand while hammering with the other rarely ends well.
Materials that move unexpectedly create mistakes.
And mistakes have a habit of attracting hammers toward fingers.
Whenever possible:
- Clamp materials securely.
- Use a stable work surface.
- Avoid awkward positions.
A few extra seconds of setup can save a lot of frustration.
Start Slowly
Many beginners think hammering is about power.
In reality, it’s about rhythm.
The first few strikes should focus on positioning and control.
Once the nail is established, speed and force can increase naturally.
Trying to drive a nail with maximum force on the first swing is often how bent nails—and colorful language—are created.
Keep Your Focus on the Task
This sounds obvious.
Yet it’s surprisingly common to become distracted halfway through a project.
A phone notification.
A conversation.
A barking dog.
A sudden thought about something completely unrelated.
The next thing you know, you’ve missed the nail entirely.
When using any tool, even a simple one, give it your attention.
The project will usually go faster anyway.
Inspect Your Hammer Occasionally
Most hammers are incredibly durable.
But they aren’t indestructible.
Check periodically for:
- Loose heads
- Cracked handles
- Damaged grips
- Excessive wear
A hammer that feels loose or unstable should be repaired or replaced before being used again.
It’s one of those situations where ignoring a small problem can eventually create a much larger one.
Respect the Tool
This might be the most important safety tip of all.
Not because a hammer is especially dangerous.
But because respect creates good habits.
The moment we start assuming accidents only happen to other people is usually the moment we’re most likely to make one ourselves.
Fortunately, a little awareness goes a long way.
And once safety becomes automatic, you hardly think about it at all.
Speaking of habits, there’s another simple practice that pays dividends over time: taking care of the hammer itself.
A quality hammer can last decades, but only if it’s given at least a little attention along the way.
Caring for Your Hammer
A hammer is probably one of the lowest-maintenance tools you’ll ever own.
No batteries.
No motors.
No complicated adjustments.
Which is exactly why many people forget about maintenance entirely.
Years pass.
The hammer sits in a toolbox, garage, basement, or shed.
Then one day it’s covered in rust, the handle feels loose, and nobody can remember the last time it was cleaned.
The good news?
A few minutes of care every now and then can keep a hammer working for decades.
Keep It Clean
You don’t need a detailed cleaning routine.
Just don’t treat your hammer like it survived a natural disaster after every project.
A quick wipe removes:
- Dirt
- Sawdust
- Moisture
- Paint residue
- Construction debris
It’s one of those tiny habits that takes less than a minute but prevents bigger problems later.
Watch for Rust
Rust rarely appears overnight.
It’s usually the result of small amounts of moisture accumulating over time.
The hammer sitting in a damp garage.
The toolbox left outside during a rainy afternoon.
The forgotten tool in the corner of a shed.
A light coat of oil and proper storage are often enough to prevent most rust-related issues.
And if you do notice surface rust, addressing it early is much easier than dealing with severe corrosion later.
Inspect Wooden Handles
Wooden handles have character.
Many people love them for that reason.
But wood naturally ages and reacts to changes in temperature and humidity.
Occasionally inspect for:
- Cracks
- Splits
- Loose heads
- Excessive wear
A damaged handle may seem like a minor issue until it fails in the middle of a swing.
That’s an experience most people only need once.
Store It Where You Can Find It
Every workshop has a mysterious place where tools disappear.
Nobody knows exactly where it is.
Yet somehow, important tools find their way there regularly.
The easiest way to avoid this phenomenon is to give your hammer a permanent home.
Whether it’s:
- A toolbox
- A pegboard
- A workshop drawer
- A wall rack
consistency saves time.
And few things are more annoying than spending ten minutes looking for a tool you’ll use for thirty seconds.
The Best Maintained Hammer Is Usually the Most Used One
Here’s something interesting.
The tools people care for most are often the tools they use most.
Not because they’re expensive.
Because they’re useful.
They’ve solved problems.
Completed projects.
Built things.
Fixed things.
Created memories.
And that’s ultimately the purpose of a hammer.
Not to sit in a toolbox looking impressive.
But to help turn ideas into finished projects, one swing at a time.
When You Need More Than a Hammer
A hammer is incredibly useful.
But let’s be fair.
If your solution to every problem is a hammer, eventually every problem starts looking suspiciously like a nail.
And that’s usually where trouble begins.
One of the biggest signs that your DIY skills are improving is realizing when another tool would make life easier.
The hammer remains an essential part of the toolkit, but it’s only one member of a much larger team.
The Screw That Refuses to Become a Nail
At some point, every DIYer encounters this moment.
You’re working on a project.
You see a screw.
You have a hammer in your hand.
For a brief second, your brain considers an option it absolutely shouldn’t.
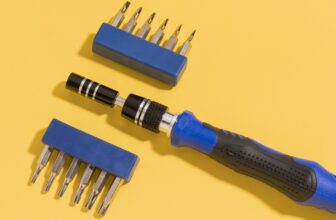
Fortunately, screws have their own specialist.
A good screwdriver provides control, precision, and a level of adjustment that a hammer simply can’t match.
When projects involve:
- Furniture assembly
- Cabinet hardware
- Door hinges
- Electronics
- Precision fastening
a quality screwdriver becomes the obvious choice.
Related Guide: Essential Screwdrivers for Your Home Tool Kit
When Things Need Gripping Instead of Hitting
Sometimes the challenge isn’t moving something.
It’s holding it.
A slippery pipe.
A stubborn wire.
A bolt hidden in an awkward location.
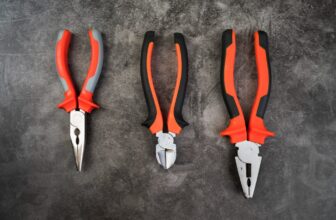
This is where pliers earn their place in the toolbox.
Many DIYers underestimate how often they reach for pliers until they own a good pair.
It’s one of those tools that quietly saves the day over and over again.
Related Guide: Complete Guide to Pliers
The Bolt That Laughs at Your Hammer
Every toolbox eventually encounters a bolt that refuses to cooperate.
You tap it.
You stare at it.
You question its life choices.
It remains completely unimpressed.
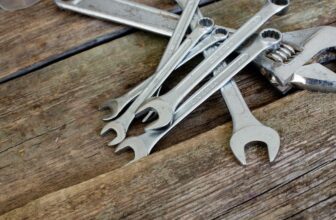
That’s because bolts and nuts belong to the world of wrenches.
Whether you’re assembling equipment, repairing furniture, or tackling plumbing projects, a wrench provides leverage and control that a hammer simply wasn’t designed to offer.
Related Guide: Guide to Different Types of Wrenches
Measuring Before Regretting
Many DIY mistakes don’t happen because someone used the wrong tool.
They happen because someone measured incorrectly.
Or didn’t measure at all.
The old saying:
“Measure twice, cut once.”
has survived for generations because it remains painfully accurate.
A tape measure, level, and square often prevent more problems than they solve.
And that’s a compliment.
The best measuring tools help mistakes disappear before they happen.
Related Guide: Essential Measuring Tools for Home DIY Projects
Building a Team of Tools
Think of your toolkit like a sports team.
The hammer isn’t supposed to play every position.
It’s the star of certain situations and completely wrong for others.
A well-rounded toolkit allows each tool to do what it does best.
The result is:
- Better projects
- Less frustration
- Faster work
- Fewer mistakes
And perhaps most importantly…
Fewer moments where you’re standing in the garage trying to convince yourself that a hammer can somehow function as a wrench.
(It can’t. Please don’t try.)
The Real Goal
The goal of DIY isn’t collecting tools.
It’s solving problems.
A hammer solves some of them brilliantly.
Other problems belong to screwdrivers, pliers, wrenches, measuring tools, or power tools.
The more you learn about each tool’s strengths, the easier it becomes to choose the right one for the job.
And that’s usually the point where projects start feeling less intimidating and a lot more enjoyable.
Now let’s tackle some of the most common questions homeowners have when choosing and using hammers.
Frequently Asked Questions
What type of hammer should most homeowners buy?
If you’re only buying one hammer, a 16-ounce claw hammer is usually the safest choice.
It’s versatile enough for:
Hanging pictures
Furniture assembly
Small woodworking projects
General home repairs
Think of it as the Swiss Army knife of the hammer world.
Not perfect for every task.
Remarkably capable for most of them.
Is a heavier hammer better?
Not necessarily.
This is one of the most common misconceptions among beginners.
A heavier hammer can drive nails faster, but it also increases fatigue and can reduce accuracy if you’re not accustomed to using it.
For many DIY projects, control matters more than raw power.
Your shoulder will probably agree.
What’s the difference between a claw hammer and a framing hammer?
A claw hammer is designed for general-purpose use and nail removal.
A framing hammer is built for construction work and driving larger nails more efficiently.
If you’re building decks, sheds, or framing structures regularly, a framing hammer may be worth considering.
For most household projects, a claw hammer remains the better all-around option.
Are fiberglass handles better than wood?
This is one of those debates that can start surprisingly passionate conversations among tool enthusiasts.
Fiberglass handles offer:
Excellent durability
Reduced vibration
Low maintenance
Wooden handles offer:
Traditional feel
Natural shock absorption
Classic appearance
Neither choice is objectively right.
The best handle is usually the one that feels comfortable in your hand.
Why do my nails keep bending?
First, don’t worry.
You’re in good company.
Bent nails have humbled DIYers for generations.
Common causes include:
Striking at an angle
Using excessive force too early
Poor nail placement
Hard or knotty wood
A few controlled taps to start the nail usually work better than trying to drive it home immediately.
Can a hammer last a lifetime?
A quality hammer absolutely can.
Unlike many modern tools and gadgets, a well-made hammer doesn’t become obsolete.
With basic care and proper storage, it’s entirely possible for a hammer to remain useful for decades.
Some become family heirlooms.
Others become legendary because nobody can remember exactly how old they are.
Do I need more than one hammer?
Eventually, perhaps.
Immediately, probably not.
Most homeowners can complete years of projects using a single quality claw hammer.
Additional hammers become useful when projects become more specialized.
A rubber mallet is often the second hammer many DIYers add to their collection.
What is the biggest mistake beginners make with hammers?
Besides introducing their thumb to the striking face?
Probably buying a hammer based on appearance rather than intended use.
A hammer should be selected based on the projects you’re doing, not because it looks impressive hanging on a store display.
The goal is solving problems efficiently, not winning a hammer beauty contest.
Final Thoughts
It’s easy to underestimate a hammer.
After all, it doesn’t have a battery.
It doesn’t connect to an app.
It doesn’t come with dozens of settings or flashy features.
It’s just a hammer.
And yet, generation after generation, it remains one of the most useful tools ever created.
There’s something satisfying about that.
A hammer doesn’t promise to make you a master craftsman overnight.
It simply does its job.
Reliably.
Consistently.
Project after project.
Whether you’re hanging your first picture frame, building a workbench, repairing a fence, or tackling a weekend DIY project, a good hammer helps turn ideas into reality.
Not with complicated technology.
Just with simple, dependable performance.
The funny thing is that many people spend hours researching tools before they ever start a project.
The hammer teaches the opposite lesson.
At some point, research has to stop.
The toolbox has to open.
And the work has to begin.
Because DIY skills aren’t built by reading about tools.
They’re built by using them.
So choose a hammer that feels right.
Learn how to use it well.
Accept that a bent nail or two is part of the learning process.
And remember:
Every experienced DIYer started exactly where you are now.
Usually with a hammer in one hand and absolutely no idea what they were doing.
The difference is that they started anyway.